Rock Linux 8
一、Installing Rocky Linux 8
1.xrdp(遠端桌面、注音、行列)
dnf install epel-release -y

yum install xrdp ibus ibus-table-chinese-array ibus-libzhuyin -y
systemctl enable xrdp --now
systemctl status xrdp
systemctl restart xrdp
firewall-cmd --add-port=3389/tcp --permanent
firewall-cmd --reload

dnf update

systemctl get-default
systemctl set-default multi-user.target
2.webmin、Samba
webmin

vi /etc/yum.repos.d/webmin.repo

[Webmin]
name=Webmin Distribution Neutral
#baseurl=https://download.webmin.com/download/yum
mirrorlist=https://download.webmin.com/download/yum/mirrorlist
enabled=1

   wget https://download.webmin.com/jcameron-key.asc
   rpm --import jcameron-key.asc

   rpm --import https://download.webmin.com/jcameron-key.asc

   dnf install webmin -y

   firewall-cmd --add-port=10000/tcp --permanent
   firewall-cmd --reload

samba
  dnf -y install samba
  systemctl enable smb nmb
  systemctl restart smb nmb
  firewall-cmd --zone=public --add-service=samba --permanent
  firewall-cmd --reload
  pdbedit -a -u kwang

  setsebool -P samba_enable_home_dirs on
  getsebool -a | grep samba

  setsebool -P samba_export_all_ro on
  setsebool -P samba_export_all_rw on
3.php 8.2
How to Install PHP 8.0 on Rocky Linux and AlmaLinux
https://www.tecmint.com/install-php-8-in-rocky-linux/

dnf install epel-release
dnf install dnf-utils http://rpms.remirepo.net/enterprise/remi-release-8.rpm
dnf module list php
dnf module enable php:remi-8.2 -y

6.How to install WordPress on RHEL 8 / CentOS 8 Linux
https://linuxconfig.org/install-wordpress-on-redhat-8

1.dnf install php-mysqlnd php-fpm mariadb-server httpd tar curl php-json

firewall-cmd --permanent --zone=public --add-service=http
firewall-cmd --permanent --zone=public --add-service=https
firewall-cmd --reload

systemctl start mariadb
systemctl start httpd
systemctl enable mariadb
systemctl enable httpd


mysql_secure_installation
4.wordpress
setsebool -P httpd_can_network_connect 1

create a new database wordpress and give new user admin access to the wordpress database with password pass
# mysql -u root -p
mysql> CREATE DATABASE wordpress;
mysql> CREATE USER `admin`@`localhost` IDENTIFIED BY 'pass';
mysql> GRANT ALL ON wordpress.* TO `admin`@`localhost`;
mysql> FLUSH PRIVILEGES;
mysql> exit


 wget https://tw.wordpress.org/latest-zh_TW.zip
 unzip latest-zh_TW.zip
 cp -r wordpress /var/www/html

 chown -R apache:apache /var/www/html/wordpress
 chcon -t httpd_sys_rw_content_t /var/www/html/wordpress -R


http://localhost/wordpress


Restore wordpress databases

  mysqldump -u root -p --databases wordpress > cgblue.sql;
  mysql -u root -p < cgblue.sql
  systemctl stop httpd.service


dnf install php-gd
dnf install imagick
dnf install php-imagick
5.安裝及設定snmp
yum -y install net-snmp net-snmp-utils

vi /etc/snmp/snmpd.conf

rocommunity public
syslocation LIB3F-CCenter

#Distro Detection
extend .1.3.6.1.4.1.2021.7890.1 distro /usr/bin/distro

#Hardware Detection (uncomment to enable)
extend .1.3.6.1.4.1.2021.7890.2 hardware '/bin/cat /sys/devices/virtual/dmi/id/product_name'
extend .1.3.6.1.4.1.2021.7890.3 manufacturer '/bin/cat /sys/devices/virtual/dmi/id/sys_vendor'
extend .1.3.6.1.4.1.2021.7890.4 serial '/bin/cat /sys/devices/virtual/dmi/id/product_serial'
extend .1.3.6.1.4.1.2021.7890.1 distro /usr/bin/distro

systemctl restart snmpd.service
systemctl enable snmpd.service

snmpwalk -c public -v 2c 127.0.0.1

下載 Distro 指令碼
curl -o /usr/bin/distro https://raw.githubusercontent.com/librenms/librenms-agent/master/snmp/distro
chmod +x /usr/bin/distro
在 SNMP 中 Distro 回應值 (/etc/snmp/snmpd.conf)
# 請在最後一行加入

extend .1.3.6.1.4.1.2021.7890.1 distro /usr/bin/distro

# 完成後存檔離開並重啟服務
systemctl restart snmpd

firewall-cmd --add-service snmp --permanent
firewall-cmd --reload
firewall-cmd --list-all

yum -y install lm_sensors i2c-tools
sensors-detect
6.logwatch
dnf install logwatch postfix -y

vi /etc/logwatch/conf/logwatch.conf

vi /usr/share/logwatch/default.conf/logwatch.conf

logwatch

/etc/cron.daily/0logwatch

service postfix restart
systemctl enable postfix
7.Mrtg
https://www.server-world.info/en/note?os=CentOS_7&p=mrtg
https://centos.bungu-do.jp/archives/tag/mrtg
1.yum -y install mrtg net-snmp net-snmp-utils

2.snmpd start

3.vi /etc/httpd/conf.d/mrtg.conf

HtmlDir: /var/www/mrtg
ImageDir: /var/www/mrtg
LogDir: /var/lib/mrtg
ThreshDir: /var/lib/mrtg
Options[_]: growright, bits
EnableIPv6: no

cfgmaker public@192.168.1.31 > /etc/mrtg/mrtg1.cfg

4.env LANG=C /usr/bin/mrtg /etc/mrtg/mrtg.cfg
env LANG=C /usr/bin/mrtg /etc/mrtg/mrtg.cfg
env LANG=C /usr/bin/mrtg /etc/mrtg/mrtg.cfg

5.indexmaker
indexmaker /etc/mrtg/mrtg.cfg > /var/www/mrtg/index.html

6.cpu
Target[cpu]: 1.3.6.1.4.1.2021.10.1.5.2&1.3.6.1.4.1.2021.10.1.5.3:commpass@localhost:
MaxBytes[cpu]: 100
WithPeak[cpu]: mw
Title[cpu]: CPU Load Avalage
ShortLegend[cpu]: percent
Unscaled[cpu]: dwmy
PageTop[cpu]: <H1>CPU Load Average</H1>
Options[cpu]: gauge,absolute,growright,nopercent
YLegend[cpu]: CPU Load Avalage (%)
Legend1[cpu]: 5 min CPU Load Average
Legend2[cpu]: 15 min CPU Load Average
LegendI[cpu]: 5min
LegendO[cpu]: 15min

7.crontab
 vi /etc/cron.d/mrtg

每5分鐘執行一次

0,5,10,15,20,25,30,35,40,45,50,55 * * * * root LANG=C LC_ALL=C /usr/bin/mrtg /etc/mrtg/mrtg.cfg --lock-file /var/lock/mrtg/mrtg_l --confcache-file /var/lib/mrtg/mrtg.ok
8.Updating Grub boot loader on Rocky linux 8
1.vi /etc/default/grub

GRUB_TIMEOUT=5
GRUB_DISTRIBUTOR="$(sed 's, release .*$,,g' /etc/system-release)"
GRUB_DEFAULT=saved
GRUB_DISABLE_SUBMENU=true
GRUB_TERMINAL_OUTPUT="console"
GRUB_CMDLINE_LINUX="crashkernel=auto resume=/dev/mapper/rl_starfish-swaprd.lvm.lv=rl_starfish/root rd.lvm.lv=rl_starfish/swap rhgb quiet nosmt"
GRUB_DISABLE_RECOVERY="true"
GRUB_ENABLE_BLSCFG=true

2.sudo grub2-mkconfig -o /boot/grub2/grub.cfg

3.sudo reboot

4.BIOS based Rocky Linux server

grub2-mkconfig -o /boot/grub2/grub.cfg

5.UEFI-based Rocky Linux server

grub2-mkconfig -o /boot/efi/EFI/rocky/grub.cfg9.Configure NFS Server
https://www.server-world.info/en/note?os=CentOS_8&p=nfs&f=1
1.dnf -y install nfs-utils
2.vi /etc/idmapd.conf
  #line 5: uncomment and change to your domain name
   Domain = cgsh.tc.edu.tw
3.vi /etc/exports
  # for example, set [/home/dc] as NFS share
  /home/dc 192.168.1.0/24(rw,no_root_squash)
4.systemctl enable --now rpcbind nfs-server
5.firewall-cmd --add-service=nfs --permanent
  firewall-cmd --add-service={nfs3,mountd,rpc-bind} --permanent
firewall-cmd --reload10.Configure NFS Client
https://www.server-world.info/en/note?os=CentOS_8&p=nfs&f=2
1.dnf -y install nfs-utils
2.vi /etc/idmapd.conf
  #line 5: uncomment and change to your domain name
   Domain = cgsh.tc.edu.tw
3.mount -t nfs cc.cgsh.tc.edu.tw:/home/dc /mnt
4.df -hT
11.logrotate
vi /etc/logrotate.d/named

/var/log/named/*.log {
  compress #壓縮輪替後的記錄檔
  create 0644 named named #指定0644權限、named使用者、named群組
  daily #每日輪替一次
  dateext #輪替後檔名加上日期
  missingok #忽略記錄檔不存在問題
  notifempty #不輪替空的記錄檔
  rotate 7 #保留7次輪替的記錄檔
  sharedscripts # 所有記錄檔輪替,只執行一次 prerotate 與 postrotate 指令
  postrotate # 輪替後指令稿
    /usr/sbin/rndc reconfig > /dev/null 2>/dev/null || true
  endscript
}


確認執行
logrotate -vf /etc/logrotate.d/named

[root@dns ~]# ll /var/log/named/
總計 136076
-rw-r--r--. 1 named named   244617 11月 30 15:43 default.log
-rw-r--r--. 1 named named     7758 11月 30 03:33 default.log-20221130.gz
-rw-r--r--. 1 named named   165394 11月 30 15:41 lamer.log
-rw-r--r--. 1 named named     3614 11月 30 00:52 lamer.log-20221130.gz
-rw-r--r--. 1 named named 72794381 11月 30 15:45 query.log
-rw-r--r--. 1 named named  2875233 11月 30 03:35 query.log-20221130.gz
-rw-r--r--. 1 named named        0 11月 29 14:45 security.log
二、Things to do after install
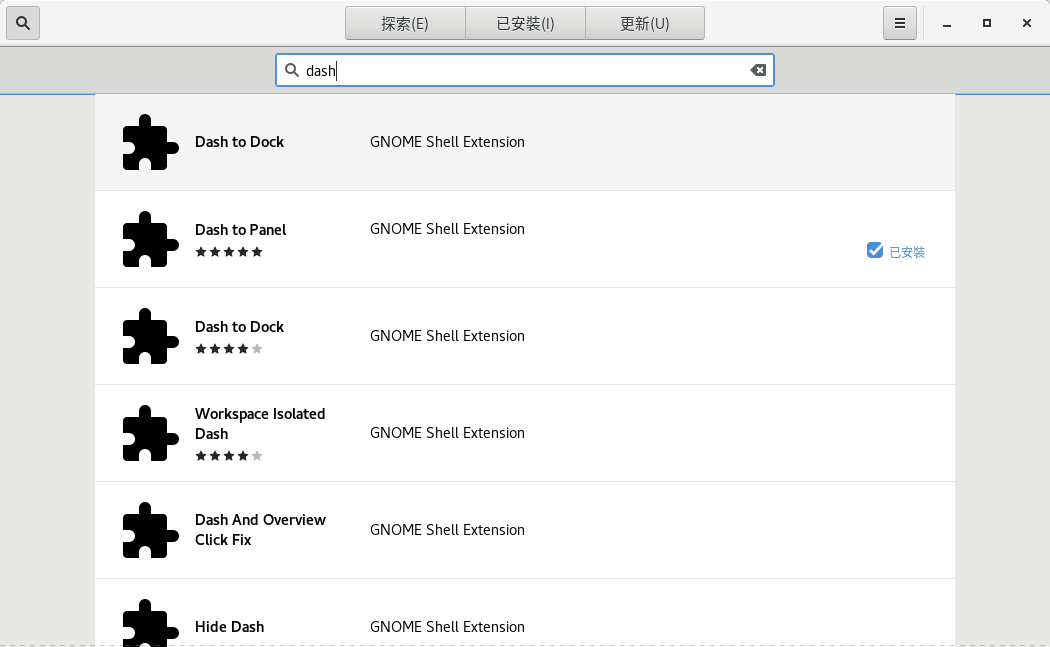
1.Dash Po panel

三、Rocky linux8 Openldap backup and restore
1.參考連結
https://n.sfs.tw/content/index/15099
https://openldapdive.wordpress.com/backup-and-restore-openldap/
2.備份設定檔及資料檔
1.備份設定檔
slapcat -n 0 -l config.ldif

2.備份資料檔
slapcat -n 2 -l data.ldif

3.停止 openldap服務
systemctl stop slapd.service
3.還原 Openldad 組態設定及資料
1.還原 Openldad 組態設定
Restore the Configuration Directory

2.檢查路徑及檔案屬性 Ldap config
[root@ssp home]# ls -ld /etc/openldap/slapd.d/
drwxr-x---. 3 ldap ldap 45 11月  7 14:43 /etc/openldap/slapd.d/

3.備份
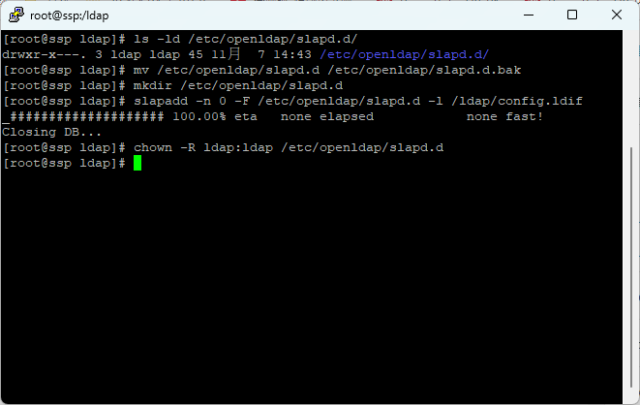
mv /etc/openldap/slapd.d /etc/openldap/slapd.d.bak

4.建立目錄 slapd.d
mkdir /etc/openldap/slapd.d

5.組態還原
slapadd -n 0 -F /etc/openldap/slapd.d -l /home/config.ldif

6.變更屬性
chown -R ldap:ldap /etc/openldap/slapd.d

7.還原 Openldad Openldap 資料
Restoring the Data Directories

8.檢查資料路徑
ls -ld /var/lib/ldap
drwx------. 2 ldap ldap 55 11月 11 14:30 /var/lib/ldap

9.備份資料
mv /var/lib/ldap  /var/lib/ldap.bak

10.建立資料目錄
mkdir /var/lib/ldap

11.還原資料
slapadd -n 2 -F /etc/openldap/slapd.d -l /home/data.ldif

12.變更屬性
chown -R ldap:ldap /var/lib/ldap

13.restorecon
/sbin/restorecon -Rv /var/lib/ldap

14.重啟服務
systemctl start slapd.service

四、Openldap 使用 TLS 連線
1.相關連結
https://dic.vbird.tw/linux_server/unit07.php
https://www.server-world.info/en/note?os=Rocky_Linux_8&p=openldap&f=1
https://www.server-world.info/en/note?os=Rocky_Linux_8&p=ssl&f=1
五、IPv6 Addresses and UNC Path Names
1.在Windows中使用IPV6 位址連接網芳
IPV6位址:2001:288:5402:13::abc
UNC Path:2001-288-5402-13–abc.ipv6-literal.net
1.把冒號「:」 換成減號「-」
2.「::」用「–」取代
3.結尾加上 .ipv6-literal.net