Altos T310 F3 SATA RAID
一、BIOS setup
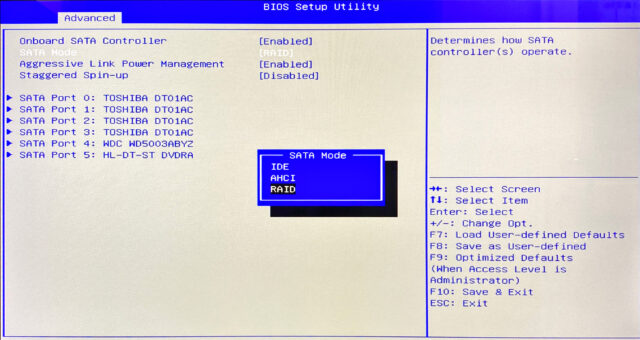
1.SATA RAID
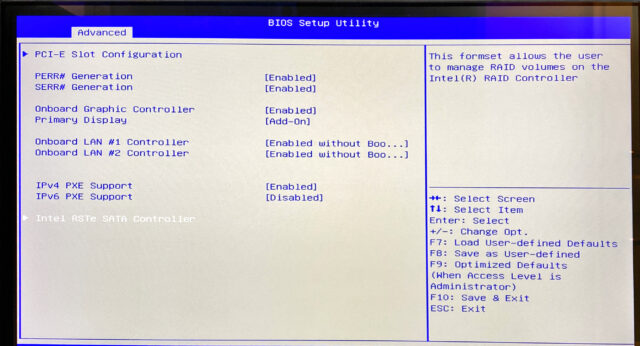
2.PCI-E configuration
Intel RSTe SATA Controller
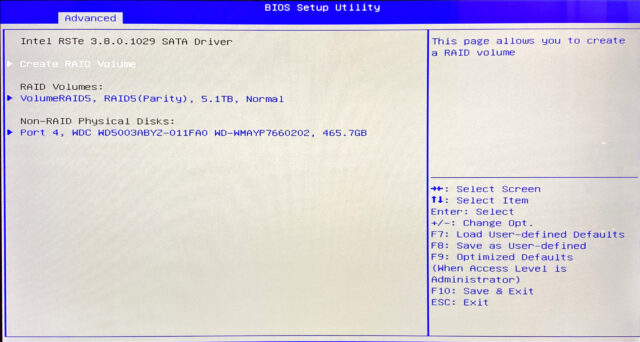
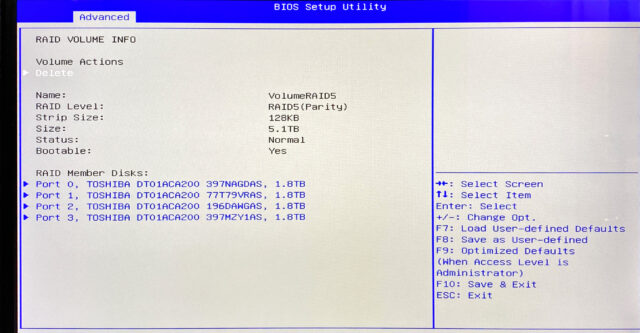
3.Create RAID Volume
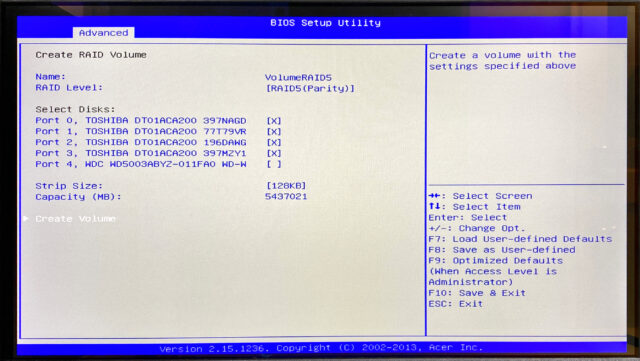
4.Create RAID Volume
二、 Centos8 gdisk
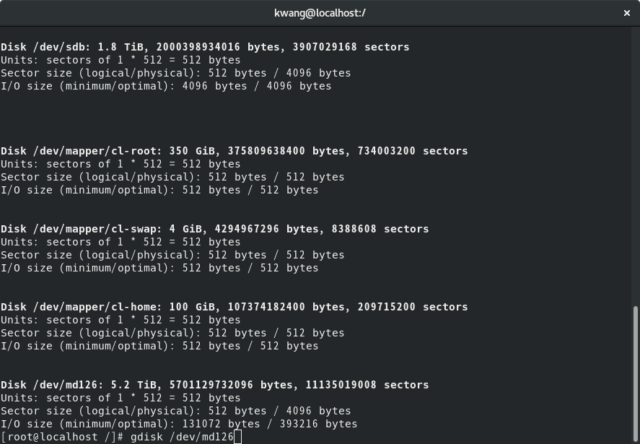
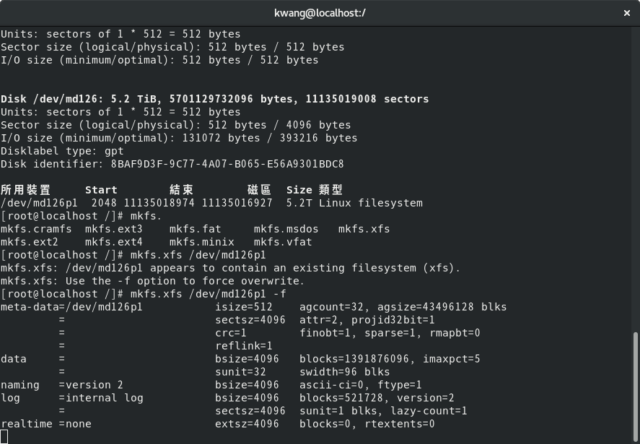
1.fdisk -l
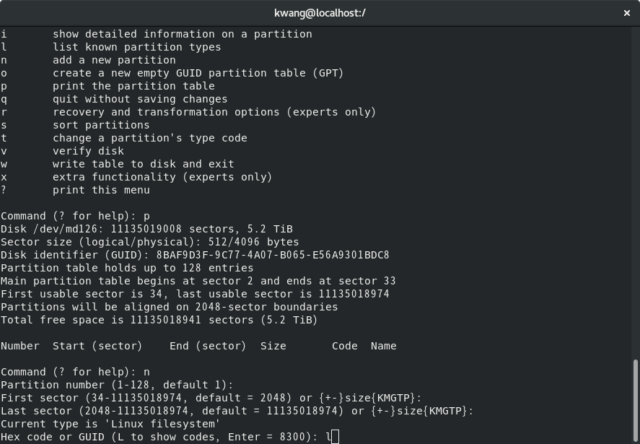
2.gdisk /dev/md126
2.gdisk 指令
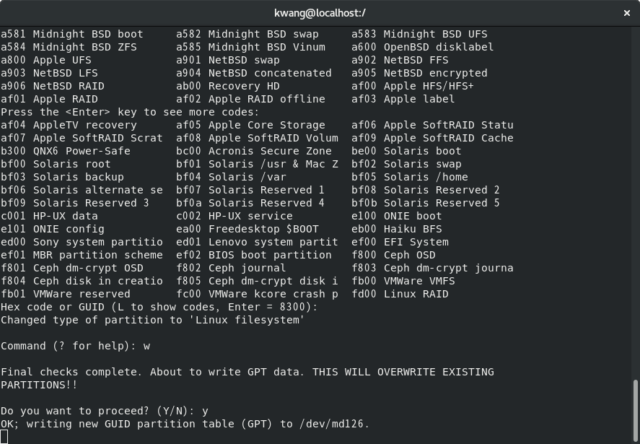
3. mkfs.xfs /dev/md126p1 -f
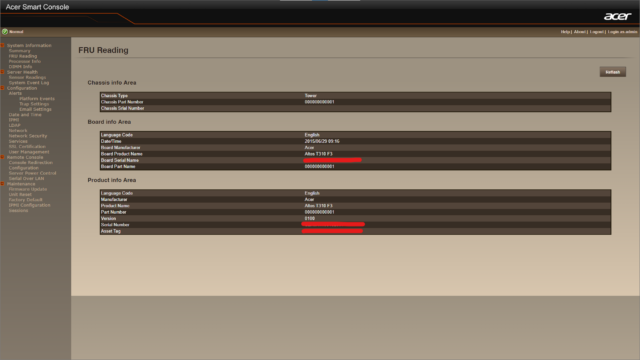
Acer Smart Console
Smart Console預設的帳號密碼是?
Username: root
Password: superuser
Centos8 最小安裝

dnf instsall cockpit
dnf install cockpit
systemctl start cockpit.socket
systemctl enable --now cockpit.socket

dnf -y install samba
systemctl enable smb nmb
systemctl restart smb nmb
firewall-cmd --zone=public --add-service=samba --permanent
firewall-cmd --reload
pdbedit -a -u user

setsebool -P samba_enable_home_dirs on
setsebool -P samba_export_all_ro on
setsebool -P samba_export_all_rw on

dnf install wget

vi /etc/yum.repos.d/webmin.repo

[Webmin]
name=Webmin Distribution Neutral
#baseurl=https://download.webmin.com/download/yum
mirrorlist=https://download.webmin.com/download/yum/mirrorlist
enabled=1


wget https://download.webmin.com/jcameron-key.asc
rpm --import jcameron-key.asc
dnf install webmin

yum install net-snmp net-snmp-utils

vi /etc/snmp/snmpd.conf

 rocommunity public
 syslocation LIB3F-CCenter

 #Distro Detection
 extend .1.3.6.1.4.1.2021.7890.1 distro /usr/bin/distro

 #Hardware Detection (uncomment to enable)
 extend .1.3.6.1.4.1.2021.7890.2 hardware '/bin/cat  /sys/devices/virtual/dmi/id/product_name'
 extend .1.3.6.1.4.1.2021.7890.3 manufacturer '/bin/cat /sys/devices/virtual/dmi/id/sys_vendor'
 extend .1.3.6.1.4.1.2021.7890.4 serial '/bin/cat /sys/devices/virtual/dmi/id/product_serial'

/bin/cat /sys/devices/virtual/dmi/id/product_name
/bin/cat /sys/devices/virtual/dmi/id/sys_vendor
/bin/cat /sys/devices/virtual/dmi/id/product_serial

curl -o /usr/bin/distro https://raw.githubusercontent.com/librenms/librenms-agent/master/snmp/distro
chmod +x /usr/bin/distro
/usr/bin/distro

systemctl restart snmpd.service
systemctl enable snmpd.service

snmpwalk -c Cg_public -v 2c 192.168.11.11

firewall-cmd --add-service snmp --permanent
firewall-cmd --reload
yum install logwatch postfix
systemctl enable postfix
vi /usr/share/logwatch/default.conf/logwatch.conf
logwatch
/etc/cron.daily/0logwatch
systemctl restart postfix.service